Follow Button
Dashboard Button
Back to top

Thursday, June 25, 2015

How to Embed Files and Videos Responsively into Blog or Website?


Today i'll teach you guys how to make your file embed code responsive. In my previous tutorial, i forgot to mention that if you embed your files using the default code provided by google drive, your files will not be responsive. In fact, default embed code from youtube, vimeo, daily motion or even map code from google maps are not responsive. As for now, only instagram, scribd (select 'autosize'), soundcloud, storify and twitter offer responsive embed codes, which means you just need to copy-paste the default embed code provided without changing anything.

What does responsive files/videos means?

Nowadays people used handy electronic devices such as smartphones and tablet more often than a laptop or computers (PC) to browse or even searching for information.Those devices come from a variety of screen sizes. It will be difficult to read something that has an improper aspect ratio (too big or too small). Responsive code play its role by automatically change the file/video width/size to perfectly fit any screen size. This is an important feature for eportfolio as it will encourage good reading and learning experiences. If you read my workshop post using ex: smartphone, you will realize that the embedded powerpoint width and size automatically fit the phone screen (even after you enable auto-rotate option).

Follow simple steps below to make the embed codes responsive:
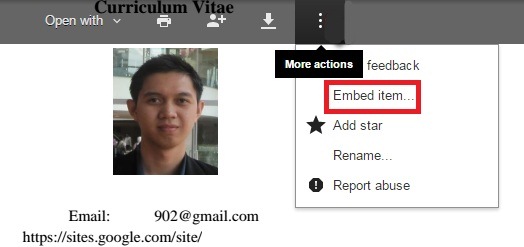
Step 1. Get the file embed codevideo get the URL


Step 2. Open embedresponsively.com > Select media source > Paste the code > Click Embed
            (If your embed code from google drive, select Generic iFrame as your media source)

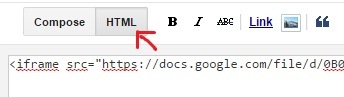
Step 3. Copy the new generated embed code > Paste it into the HTML section of your blog post/page


blogger posts and pages html codes

How to customize?

You can only change the file height, as the code is responsive and it will automatically change the file width according the screen size. To alter the height, change the value of the highlighted code above (padding-bottom: 110%). The best size for pdf/word files = 130/140% and powerpoint = 77%.


Example of default vs responsive file/video:

** View this post using mobile phone/mobile view to see the differences


❖ Using Default Embed Code


❖ Using Responsive Embed Code 
(padding-bottom: 140%)


❖ Using Default YouTube Embed Code


❖ Using Responsive Embed Code


I think that's all for now.. to all my lovely Muslim readers, i wish you guys a blessed Ramadhan. 
May the spirit of this month illuminate the world and show us the way to peace and harmony ♥ 

Smile ^___^

Wednesday, June 10, 2015

Teaching Eportfolio Development Workshop


Workshop Slideshow


Today's im assisting my SV in teaching eportfolio development workshop. All of the participants are lecturers from various fields. I can see that most of them are really passion in learning new things which makes me feel very happy :)

teaching eportfolio development workshop for lecturers at PPP, City Campus, UTeM.
Participants are having discussion in designing their teaching eportfolio

Teaching eportfolio development workshop for lecturers at PPP, City Campus, UTeM.
Participants presenting their teaching eportfolio at the end of the workshop

From my observation, people easily get scared when it comes to coding. It's not that hard actually if u're +ve & willing to learn. Once u know how to edit and implement the codes, u surely gonna love it ♡

i hate programming, programming is difficult and complicated

To all the participants, feel free to email me at blurrydino@gmail.com if you guys have any questions regarding eportfolio development/codes ok. Till then:


Good Luck in experimenting your newly developed Eportfolio & Smile! ^_____^

Tuesday, June 9, 2015

Add Static Pages & Embed Files from Google Drive into Blogger


Blogger Static Pages allows us to create specific pages for our blog/eportfolio such as About Me, Curriculum Vitae, Contact & etc. on stand-alone pages that are linked from your blog. The static pages basically are the same post pages, but there are several things that make them different. One of the differences is that static pages don't apppear in the home page, don't have a label, and are not indexed as archive pages.

Follow simple steps below to create it:

Step 1. Go to Blogger Dashboard > select your blog > go to Pages and click on New Page.


blogger static pages

Step 2. Type the title (not compulsory) and write the page's content.

blogger page content

Step 3. Before publishing it, click on Preview to see how it will appear on your blog.

blogger preview


Step 4. When you have finished the editing, click on Publish button. Then, click View

blogger view pages

Step 5. You will be redirected to a new tab which is your new page. Copy the URL & paste it into 
             your drop down menu bars html coding and you're done!

blogger pages URL

Now you have owned the static page. If you want another static page, just repeat the steps above :)


Embed files from Google Drive

Next we will learn how to embed files from Google Drive into your blogger page/post. Fyi, all gmail users have google drive which comes with free 15GB storage! With this drive, you can store and share lots of online files such as PDF, words, power point, video and etc. So, if you want to embed your google drive files like the above picture, follow the steps below:


Step 1. Go to your Google Drive > Right-Click the file you want to embed and Choose Share

google drive file share option

Step 2. Next click Advanced to your Google Drive > Click Change > Choose On - Public on the web 
           > Click Save and Done.

google drive advanced share setting


Step 3. Double Click file that you want to embed > Click on Pop-out

google drive pop-out button

Step 4. You will be directed to a new tab, at the new page, choose More actions, click Embed item 
             and copy the code.

google drive embed item

Step 5. Next go to your Blog > Choose posts/pages > Click New post/page > Choose HTML 
             and Paste the code.
blogger html

Step 6. Click on Preview to see how it will appear on your blog and click Publish when you are done :)

P/s: You can also change the width and height of the embed file by changing its code value.
       (not necessary if you are using responsive embed code)

Embed code example:
<iframe src="https://docs.google.com/file/d/0B0lYSJVoAi5pMXc3Vmw5UDVFakE/preview" width="640" height="480"></iframe>

GOOD LUCK! ^___^


Friday, June 5, 2015

Add Menu Bar with Drop Down Menus for Blogger


Today's tutorial i will teach you guys how to add drop down menus for blogger. This is an important feature for blog/eportfolio because it's not only improving the looks of your blog, but also it’s navigation. Thus, helping your readers to reach your web content more easily. By default blogger just provide a simple menu bar, so in this tutorial i'll show you how to have the same menu bar with drop down menus.

Add Drop Down Menu Bars for Blogger tutorial

dropdown menu bars tutorial for blogger

Step 1. Go to Blogger Dashboard > select your blog > go to Layout and click on Add a Gadget link.
            (choose add a gadget link below the header as we want our menu bars to be in that position)

blogger add a gadget below header

Step 2. When the popup window appears, scroll down and choose the HTML/JavaScript widget.

blogger html/javascript widget

Step 3. Copy the following code, Paste inside the empty box, and Replace it with all your links:

<!-- start navmenu -->
<ul id='cssnav'>
<li class="active"><a href='PUT-HOME-LINK-HERE'>Home</a></li>
<li class="sub"><a href='PUT-CATEGORY-ONE-LINK-HERE'>Category 1</a>
<ul>
<li><a href='PUT-SUB-CATEGORY-ONE-LINK-HERE'>Sub-category1</a></li>
<li><a href='PUT-SUB-CATEGORY-TWO-LINK-HERE'>Sub-category2</a></li>
<li><a href='PUT-SUB-CATEGORY-THREE-LINK-HERE'>Sub-category3</a></li>
</ul>
</li>
<li><a href='PUT-CATEGORY-TWO-LINK-HERE'>Category 2</a>
<ul>
<li><a href='PUT-SUB-CATEGORY-ONE-LINK-HERE'>Sub-category1</a></li>
<li><a href='PUT-SUB-CATEGORY-TWO-LINK-HERE'>Sub-category2</a></li>
<li><a href='PUT-SUB-CATEGORY-THREE-LINK-HERE'>Sub-category3</a></li>
</ul>
</li>
<li><a href='PUT-CATEGORY-THREE-LINK-HERE'>Category 3</a>
<ul>
<li><a href='PUT-SUB-CATEGORY-ONE-LINK-HERE'>Sub-category1</a></li>
<li><a href='PUT-SUB-CATEGORY-TWO-LINK-HERE'>Sub-category2</a></li>
<li><a href='PUT-SUB-CATEGORY-THREE-LINK-HERE'>Sub-category3</a></li>
</ul>
</li>
<li><a href='PUT-CATEGORY-FOUR-LINK-HERE'>Category 4</a>
<ul>
<li><a href='PUT-SUB-CATEGORY-ONE-LINK-HERE'>Sub-category1</a></li>
<li><a href='PUT-SUB-CATEGORY-TWO-LINK-HERE'>Sub-category2</a></li>
<li><a href='PUT-SUB-CATEGORY-THREE-LINK-HERE'>Sub-category3</a></li>
</ul>
</li>
</ul>
<!-- end navmenu -->
Note:
- Links can be static pages, websites, social networks, and etc.
- There is no styling added yet and the menu will disarrange because we still didn't put any CSS code
- You can add more categories and sub-categories as you need by just copying the same format as 
   listed in the example above - remove <ul>....</ul>  will eliminate drop down menus.

Step 4. Go to Template > click Customize > choose Advanced and click Add CSS

add css to blogger template design

Step 5. Copy the following code and Paste inside it:

Select Code
/* ----- CSS Nav Menu Styling ----- */
#cssnav {
margin: 0px 0 0 -30px;
padding: 0px 0px 0px 0px;
width: 880px;  /* Set your width to fit your blog */
font: $(tabs.font); /* Template Designer - Change Font Type, Size, Etc */
color: $(tabs.text.color); /* Template Designer - Change Font Size */
}

#cssnav ul {
background: $(tabs.background.color) $(tabs.background.gradient) repeat-x scroll 0 -800px;
_background-image: none; /* Template Designer - Change Menu Background */
height: 20px; /* Change Height of Menu */
list-style: none;
margin: 0px;
padding: 0px;
}

#cssnav li {
float: left;
padding: 0px;
}

#cssnav li a {
background: $(tabs.background.color) $(tabs.background.gradient) repeat-x scroll 0 -800px;
_background-image: none; /* Template Designer - Change Menu Background */
display: block;
margin: 0px;
font: $(tabs.font); /* Template Designer - Change Font Type, Size, Etc */
text-decoration: none;
}

#cssnav > ul > li > a {
color: $(tabs.text.color); /* Template Designer - Change Font Color */
}

#cssnav ul ul a {
color: $(tabs.text.color); /* Template Designer - Change Color */
}

#cssnav li > a:hover, #cssnav ul li:hover {
color: $(tabs.selected.text.color); /* Template Designer - Change Font Color on Hover */
background-color: $(tabs.selected.background.color); /* Template Designer - Change Font Background on Hover */
text-decoration: none;
}

#cssnav li ul {
background: $(tabs.background.color) $(tabs.background.gradient) repeat-x scroll 0 -800px;
_background-image: none; /* Template Designer - Change Menu Background */
display: none;
height: auto;
padding: 0px;
margin: 0px;
position: absolute;
width: 200px; /* Change Width Of DropDown Menu */
z-index:9999;
}

#cssnav li:hover ul {
display: block;
}

#cssnav li li {
background: $(tabs.background.color) $(tabs.background.gradient) repeat-x scroll 0 -800px;
_background-image: none; /* Template Designer - Change Background */
display: block;
float: none;
margin: 0px;
padding: 0px;
width: 200px; /* Change Width Of DropDown Menu */
}

#cssnav li:hover li a {
background: $(tabs.selected.background.color); /* Template Designer - Change Background of Link on Hover */
}

#cssnav li ul a {
display: block;
height: auto;
margin: 0px;
padding: 10px;
text-align: left;
}

#cssnav li ul a:hover, #cssnav li ul li:hover > a {
color: $(tabs.selected.text.color); /* Template Designer - Change Text Color on Hover */
background-color: $(tabs.selected.background.color); /* Template Designer - Change Background on Hover */
border: 0px;
text-decoration: none;
}
>>  you can change width: 880px to any suitable value to make the menu bar fit with your blog width <<

Step 6. Choose Tabs Text/Backgrounds and customize it based on your preferences > click Apply 
             to Blog after you have finished, and you're done! XD

blogger tabs background
   * Selected color refer to the color change when you hover your cursor to the tab text/menu bar


P/s: If you guys have any questions, don't hesitate to ask in the comment section below ok :)